The Next Warhammer Scenery Painting Challenge!

Off The Top of My Head

It may be patently obvious from my Sector Imperialis post I love Citadel Scenery.

Being a narrative player the world building portion of the game is my favorite, and nothing builds a story better than creating an interesting environment for your battles.

Over the years I’ve acquired a lot of Warhammer 40k and Warhammer Fantasy battles scenery.  I’ve painted a few pieces but never got around to painting the vasst majority.  Completing my cityscape got the painting bug back in me and I decided to start doing the rest.  It’s no small task but even the small progress I’ve made makes a huge difference!

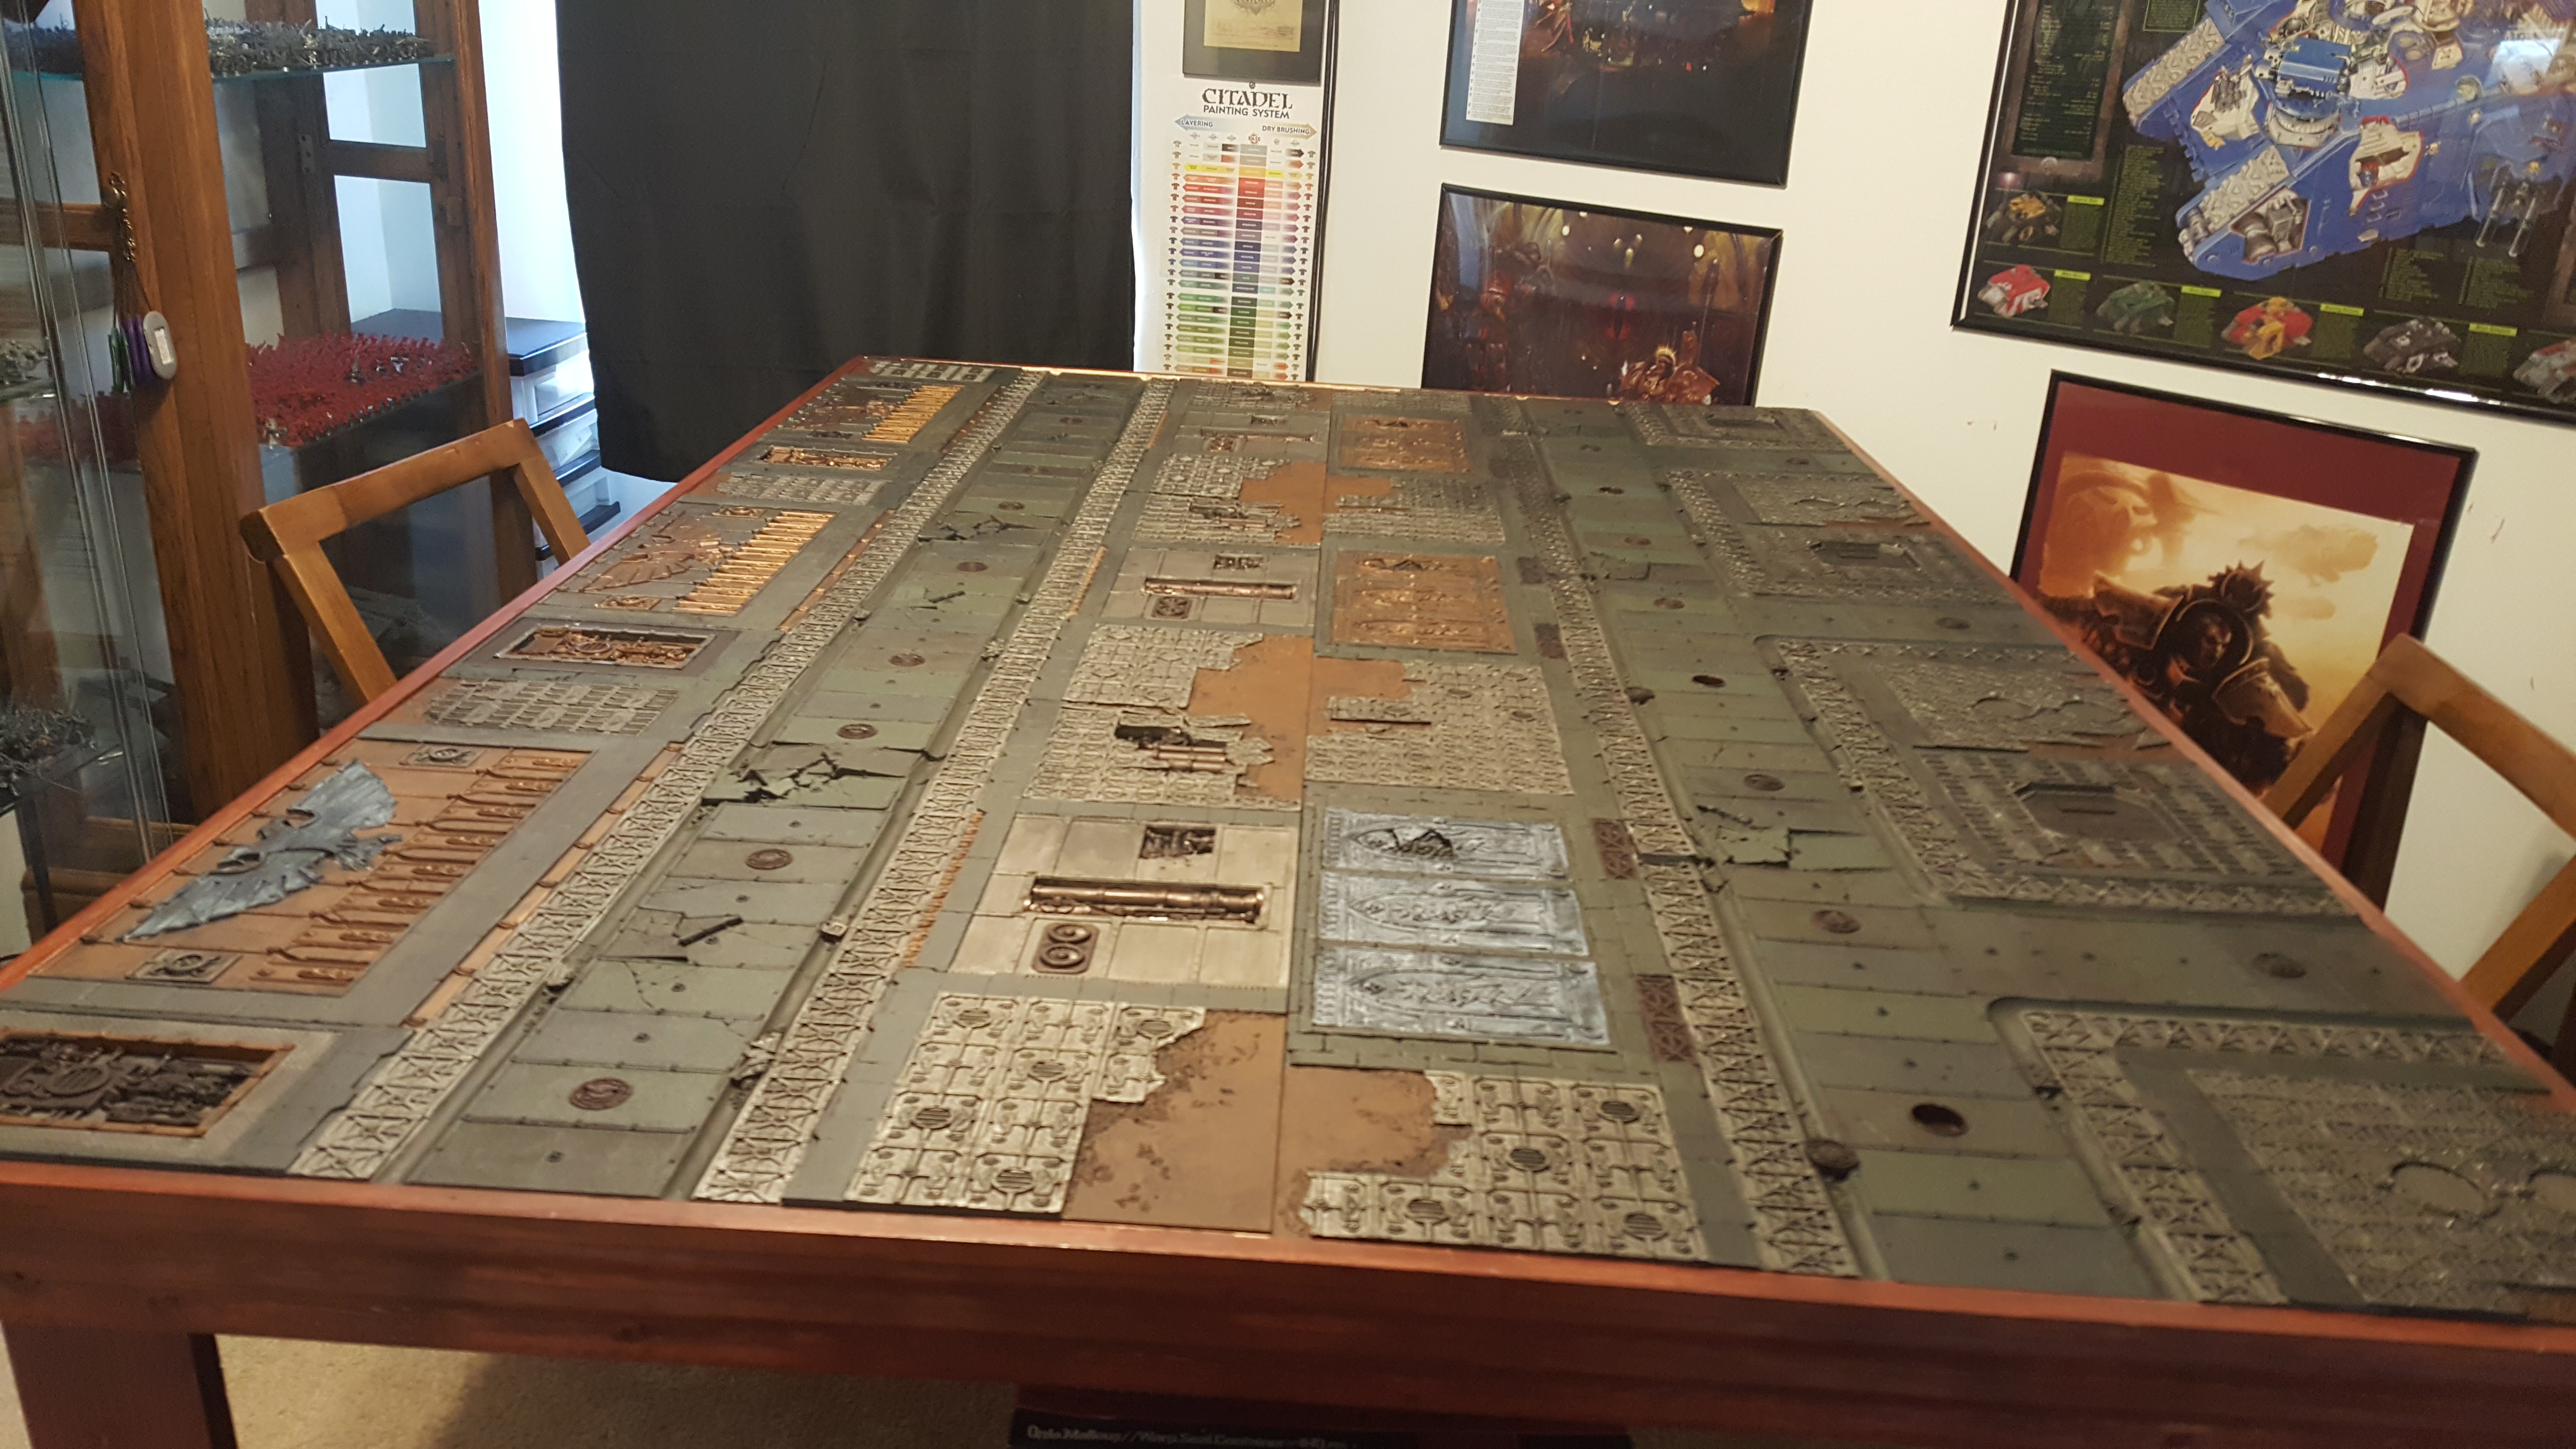
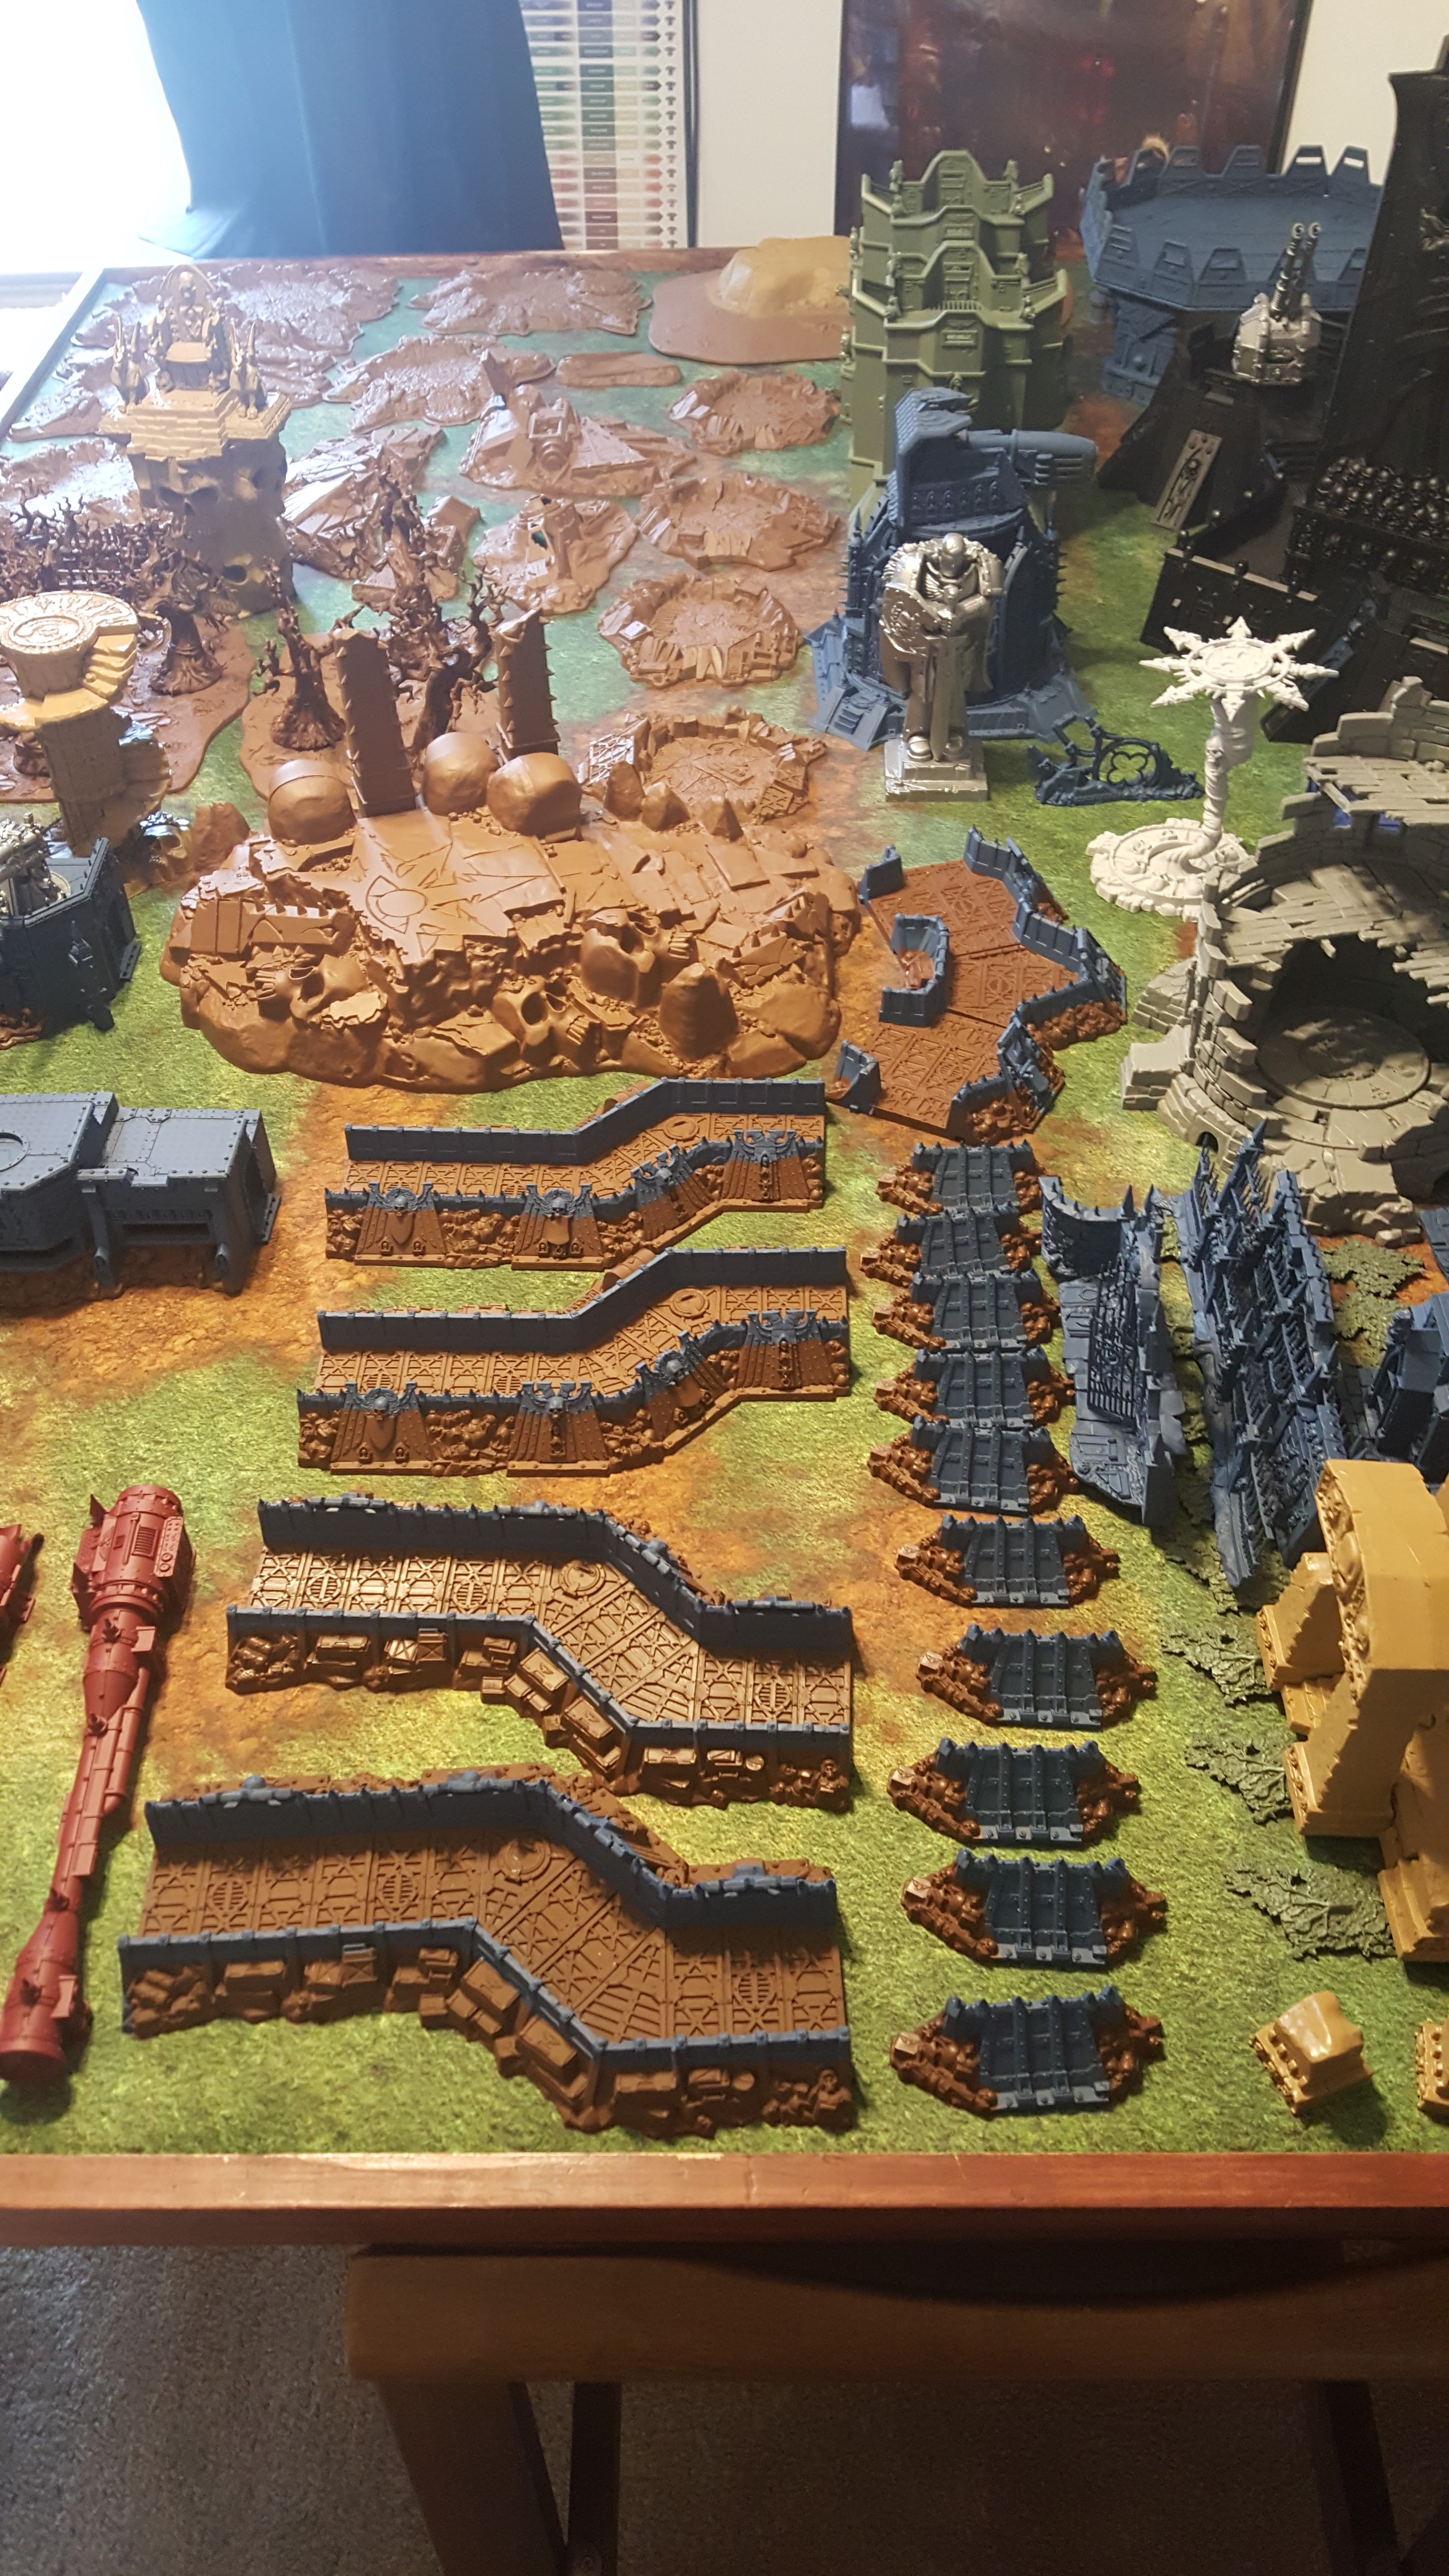
Craters, earthshaker cannon craters, a crashed Aquila Lander, a Citadel Hill, two Citadel woods, fantasy walls and fences, Magewrath Throne, Eternity Stair, Temple of Skulls, Firestorm Redoubt, some quad guns and Icarus Lascannons, a Wall of Martyrs Bunker, a Haemotrope Reactor, and some Promethium Relay pipes.

A lot of the craters and the hill I hand painted with what was left over from my Realm of Battle board.  Everything was spray painted with GW or Army Painter sprays.  Mournfang Brown, Desert Yellow, and Khorne Red making of the majority with some Fang spray on the Wall of Martyrs details.

Here you can see more Wall of Martyrs defensive lines, a Plasma Obliterator, a Balewind Vortex, the Honored Imperium set, and two Bastions.

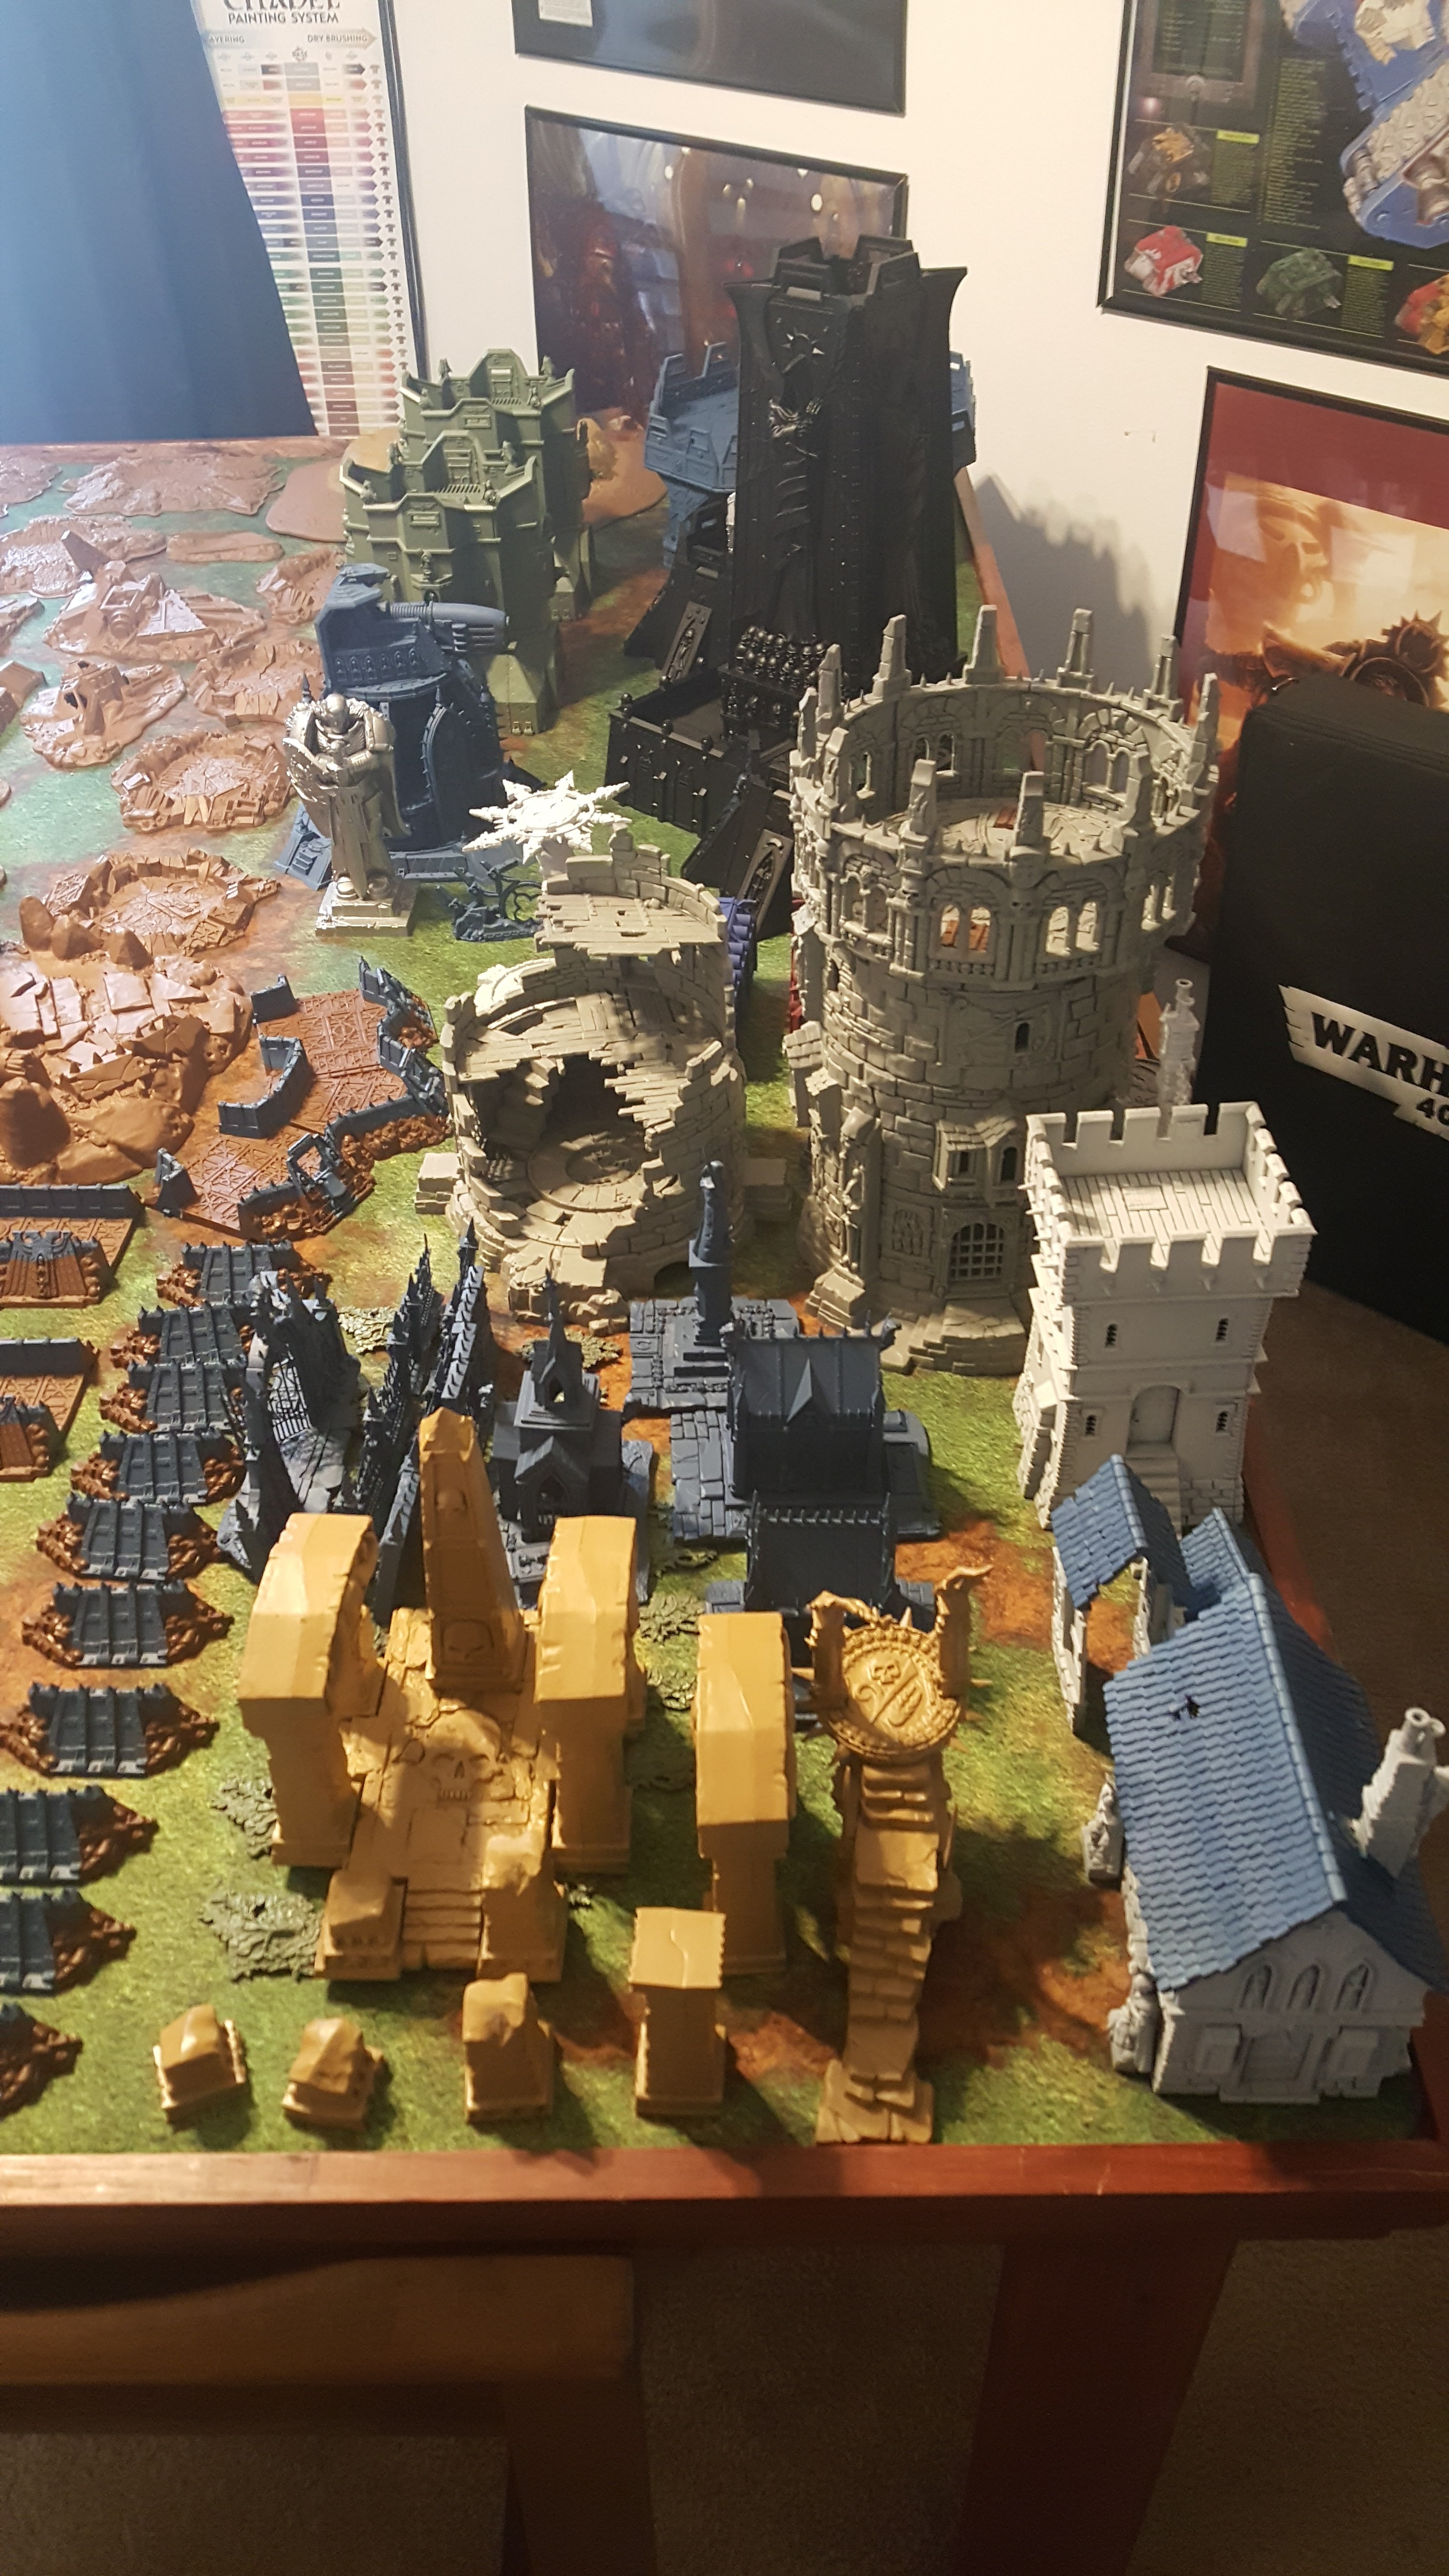
The Skyshield landing pad, Fortress of Redemption, armored shipping containers (behind the towers) Witchfate Tor, Dreadstone Blight, The Garden of Morr, a watch tower and chapel from the fortified manor set (where my walls and fences came from too), Arcane Ruins, and the Dreadfire Portal.

Here’s the lot!

My Basilica Adminstratum, Manufactorum, Shrine of the Aquila, And Sanctum Imperialis ses are actually primered too, but they didn’t fit on my table!

Here’s hoping in the next few weeks I can provide updates on the progress of these sets too.  Getting all of this done will be a major accomplishment for me!

Making Easy Wargaming Smoldering Wrecked Vehicle Markers!

Off The Top of My Head

While trying to re-learn the intricacies of Warhammer 40k again I remembered what a pain it is to show a vehicle as being “wrecked.”  Many makers, including Citadel/Games Workshop, make “wrecked” markers, but none of these ever seem to have the gravitas necessary to show the drama of an exploded tank or burning transport.

While re-learning the game I found myself watching a lot of battle reports on YouTube.  By far the best have been by StrikingScorpion82 whose games are both narrative and competitive.  They are also filled with great personalities and cinematic moments.  Scorpion also has a number of reviews and “how to” videos, my favorite being how he makes his wrecked vehicle markers.  His are durable, well-built works of art.  You can see his technique here:

After seeing this I wanted to make some of my own, but wanted to add a bit of effect and admittedly wanted to spend twenty dollars or less…  They aren’t as dynamic as his but are MUCH better than turning a tank of its side!  here’s what I did:

I started with some red flickering LED tea lights.  I got mine from Amazon for $8.59:

41hpvupoerl-_sl1024_

I went for red to give it the internal smoldering look I wanted.  They come in packs of twelve to give you plenty to work with.

I added some bent paper clips, which won’t be anywhere near as durable as the copper wire Scorpion uses but I had them on hand.  I used Gorilla Glue white to attach them to the candles.  I used two different version; one bent in half the other bent to stand all the way up with a folded hook at the top. The latter proved to be FAR easier to work with:

20170226_174935I masked off the bottoms of the candles (where the batteries, electronics, and switches are) and prepped the “smoke” portion.

Scorpion started with cotton wool, but I only had access to polyfill, which I got at Walmart for around $4.  I used copious amounts of PVA glue on the sides of the candles and shaped some polyfill around the base.  I then took various portions of the polyfill and shaped different “smoke” shapes around and on the paperclip bases:

20170226_183227
You can see the polyfill around the basses in the back. The rubber bands weren’t actually too hard to take off, but also weren’t really needed. I just held each piece for a few seconds and they usually stayed. Ignore Konrad cat seated in the background…
20170226_184058
Like Scorpion I made various sizes, based around two basic heights.

20170226_194839

I followed the instructions on the tutorial and spray based them all gray.

20170226_200437Then added the black spray around the lower portions of each marker.

You can see the finished videos of them below!

Realm of Battle Sector Imperialis COMPLETED!

Off The Top of My Head

So it finally happened.  Over the weekend I took two days and completed the Sector Imperialis Realm of Battle board I started 2+ years ago!

Again following on from our lord and savior, Duncan Rhodes, I used the techniques he detailed to complete the painting!

20170219_160456

Using pre-printed gaming mats is easy and fast, but for drama and detail it’s hard to beat this board.  Tt’s flexibility (six tiles that can arranged in various ways) and aesthetic are hard to beat.

20170219_185348You can see the tiny bit of Nurgle’s Rot I added to the open sewers for effect.

20170219_185514In Rhodes’ terrific tutorial he suggested using washes of varying colors to add character to the road.  This worked VERY well.  Here you can see the colors he recommended, Nuln Oil, Agrax Earthshade, and Athonian Camoshade with Dawnstone drybrushed over it.  You can also see the gutters.  They have also been washed with all three and finished with some Typhus Corrosion.  A bit of Typhus Corrosion was also added to the detritus in the gutters to unify the look.

20170219_185519

Other than Skavenblight Dinge, which was used for all the road and stone sections, my Leadbelcher stock took a big hit.  All this metal…  Here the metal floows and mechanical components are displayed.  All were washed in Nuln and drybrushed with Necron Compound.

20170219_185357

These bronze sections are some of my favorite pieces.  They were based in Balthasar Gold, washed in Nuln Oil, drybrushed with Necron Compound, and detailed with Nihilakh Oxide.

20170219_185403

One of the crypt sections and one of the eagles I wanted a marble effect.  They were based in Ceramite White, washed in Drakenhof Nightshade, and drybrushed with Prixati White.

If you’re thinking of painting one of these beware…you’ll get through some paint, this handful got me through about half of it:

20170219_110925

This was a great project and one I may be detailing and changing periodically as I use it.  It’s a great central piece and if you have one a fun project!

Warhammer Fantasy Painting: Skarsnik!

Skarsnik is one of my favorite Warhammer characters.  The so-called warlord of the Eight Peaks (I’m a Queek Headtaker fan so I dispute that) has a great personality, a weirdo backstory, and some creative tabletop rules that include his wonderful partner-in-crime Gobbla.

I got my model (as I’ve gotten many of my favs, see Taurox the Brass Bull) off of eBay damaged.  I actually like damaged models.  You get them cheap and  give you tons of chances for creativity.  You can use your own parts to replace missing ones and even completely change a model entirely.  It’s ton’s of fun and economical.

I had to add my own spikes to Skarsnik’s back and replace his sickle-sword but that was just part of the fun.  I give you my Skarsnik:

20160802_184122 20160802_184111 20160802_184104 20160802_184050 20160802_184040

Warhammer Fantasy Painting: Night Goblin Big Boss on Great Cave Squig

So here’s a fact: I like squigs.  I don’t know why but I can’t get enough squig units or squig related models.

After finishing my wyvern and liking the way his squiggy shield turned out I moved on to paint my Night Goblin Bigboss on a Great Cave Squig.

First off I love this model.  The posture of the gobbo looks like he’s barely holding on to his bounding mount and the squig is wonderfully expressive and full of personality.

20160726_194742

I went classic on all the colors. The night goblin boss is wearing traditional black robed with a bit of blue edging.

I was pretty happy with the helmet too, as it’s clear it was looted from dwarfs.

20160726_194807

But the squig is where it’s at in this model.

His massive teeth are incredibly fun to paint and I haven’t had a chance to paint real bone so clearly in previous models.

20160726_194753

I was running low on 40mm bases so I repurposed one from a troll.  It worked pretty well as the pre-textured based made for nice cave environment.

20160726_194800

Next week, the biggest Night Goblin boss with the greatest squig of them all (may he rest in peace…)

Warhammer Fantasy Painting: Orc Warboss on a Wyvern

Off The Top of My HeadThough I don’t have anything specific against Age of Sigmar I still prefer the regimental blocks and high-concept rules of Warhammer Fantasy Battles.  Something about huge blocks of troops and monsters crashing into each other and fighting in more linear combat than the modern, tactical squad-based war of 40k.

Having recently played Warhammer: Total War (which is a perfect marriage of concepts as far as I’m concerned) I returned to painting my poor fantasy armies.

I started the game with the Orc faction and decided to start with my orc army.

I picked up this metal Orc Warboss on a Wyvern at a friendly local game shop.  The model seemed a little wonky but I liked the look of it and knew these weren’t exactly for sale everywhere any more.  I’m glad I did.

I used all basing and dry-brushing techniques.  These are my favorites and since I don’t have an airbrush tend to give me the best results for most of my models.

The wyvern is a bright green but I used a tan color for the wings instead of flat green.

20160621_190553

It was a lot of layering, shading, and dry brushing, but I was really happy with the result.

20160621_190628

The warboss was actually more fun than the wyvern.

20160621_190638

I was particularly fond of how the squig on his shield turned out.

20160621_190646

This was a terrifically fun model to paint (and Pacific Rim was the perfect movie to watch while painting). I ended up liking him a lot, even though, admittedly, I mostly wanted to paint this guy for practice since the one I really want to do is this guy.  Azhag the Slaughterer!

He’ll be appearing soon!